recipe sunday

188 posts

Making Homemade Ricotta and then Italian Bread With The Whey

This fall I stumbled on a recipe for homemade ricotta. I had no idea that making ricotta was even an option in an apartment kitchen, let alone a kitchen that can barely fit two people standing side-by-side. But there it was – an incredibly easy ricotta recipe on Epicurious. And, in the comments following the recipe, a woman talked about making bread from the whey left over from making the ricotta. Holy shit.

Homemade Ricotta (via Epicurious)

2 quarts whole milk

1 cup heavy cream

1/2 teaspoon salt

3 tablespoons fresh lemon juice

Very slowly bring the milk, cream and salt to a boil on moderate heat and stir occasionally to keep it from burning. Then lower the heat, add the lemon juice, stir it constantly and watch it curdle.


At this point you will think, “Wow, what a mess. This was a tragic waste of time.”

But, continue on anyway. Line a colander with the cheesecloth, and place it over the bowl. Slowly dump the curdled mess into the colander.

Let it sit for an hour. Then you will be in awe of yourself. You will pat yourself on the back while simultaneously calling your friends, co-workers, parents, ex or current lovers, your veterinarian, and your old college roommate.

You just made homemade ricotta!

And not just any homemade ricotta, you will have made the best ricotta that you have ever tasted. Slightly lemony, thick and soft, ricotta. (See top photo.)

Take a bow, and then get back to work – because collected in the bowl is a lot of whey, and you’re going to make 3 loaves of incredible Italian bread with it. (Recipe via Eating Small Potatoes with a few tweaks)

Homemade Italian Bread

5 cups all-purpose flour
2 tsp. salt
1 tbl. sugar
4 1/2 tsp. yeast

3/4 hot whey
1 cup warm water
5 tbls. melted butter

Additional ingredients (to your preference) are cornmeal and sesame seeds.

Add dry ingredients to the bowl and stir.
2. Heat the whey and water in a saucepan. Pour butter into the whey/water mixture.
3. Add the liquid ingredients to the dry ingredients. Stir well until combined. (At least 5 minutes.)
4. Divide dough into 3 loaves. Pat the dough into a rectangle and then roll up into a cylinder. Pinch seams and edges, then shape.
5. Place the loaves onto a sheet pan sprinkled with cornmeal. Cover and rise in a warm place for 1 hour.
6. Paint the loaf with egg white and sprinkle with sesame seeds.
7. Bake at 425F for 30 minutes.

Amaze your friends and astound your enemies with your culinary prowess.

And leave your own recipes, because after all,  it’s Recipe Sunday where we are all about food.

Recipe Sunday Thursday: Irish Soda Bread

On this day of binge-drinking and misguided attempts to show off your jigging skills, here’s an easy-to-make and delicious recipe for Irish Soda Bread. Soda breads use baking soda instead of yeast as a leavening agent, and as far as we know, were first introduced to Ireland in the 1840s. Irish soda bread traditionally has a cross cut into the top before baking, which may help it to rise and/or keep away the devil. You can do other designs though; whatever tilts your tea kettle!

The somewhat surprisingly irate people over at The Society for the Preservation of Irish Soda Bread contend that there is only one “true” form of Irish soda bread, and any additional ingredients are an abomination to the bread and humanity (actually only a slight exaggeration). Nevertheless, if you want to add raisins, nuts, gummi bears, or even some green food dye to your soda bread, I say go for it.

The following recipe is from The Joy of Vegan Baking, by Colleen Patrick-Goudreau. The milk and butter in the recipe can obviously be either vegan or not.

Ingredients

  • 2 cups (470 ml) milk
  • 2 teaspoons white distilled vinegar
  • 4 cups (500g) flour (can be whole wheat, white, or a mixture of both)
  • 1 teaspoon baking soda
  • 1 teaspoon salt
  • 1/4 cup butter, melted

Preheat the oven to 425ºF (220ºC). Lightly grease a round 9- or 10-inch cake pan [I just used a cookie sheet and it worked out fine]. In a small bowl, combine the milk and vinegar. Let stand for 5-10 minutes.

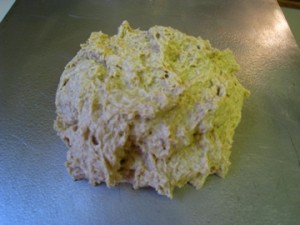
Mmmm, dough

In a large bowl, mix together the flour, baking soda, and salt. Add the milk and vinegar mixture and the butter, and combine until you have a sticky dough. Knead the dough in the bowl or on a floured surface for 10 to 12 strokes [Err on the side of handling the dough less].

Place the dough in the pan, and cut a cross [or smiley face] in the top. Bake for 40-45 minutes, or until the bottom has a hollow sound when thumped. Cool slightly before smoothing.

Soda bread is delicious when toasted lightly and buttered, or dunked in some soup or sauce. Enjoy!

Recipe Sunday: Chipotle Chicken With Cumin Cream Sauce

Our anniversary was last week, and to celebrate we walked around Burlington and then we went out to dinner.

It was an amazing dinner. In fact it was so good, that I intentionally left about half of it on my plate to bring home for dinner the next night. But, the restaurant was busy, we had shopping bags in the booth with us, and it took us a while to pile on our layers of winter attire. As a consequence, I didn’t realize that I had left my doggie bag on the restaurant table until we were half-an-hour away.

I’m not going to lie, I was irrationally annoyed.

And I know that, “Something, something, something, is the chipotle chicken of invention.” So I decided to try to recreate the dish.

Chipolte chicken with cumin cream sauce

  • 4 chicken breasts
  • 1 tablespoon of chipotle powder
  • 1 tablespoon of ancho chili powder
  • 1 tablespoon of hot smoked paprika powder
  • 2 teaspoons of cayenne powder

Mix the spices together on a plate.

Cumin cream sauce

  • 1 large diced red onion
  • 1 large sliced shallot
  • 3/4 cup of white wine
  • 1/3 cup of half and half
  • 3 teaspoons cumin

Rub the chicken breasts with olive oil on both sides, and coat the breasts on both sides with the spice mixture.

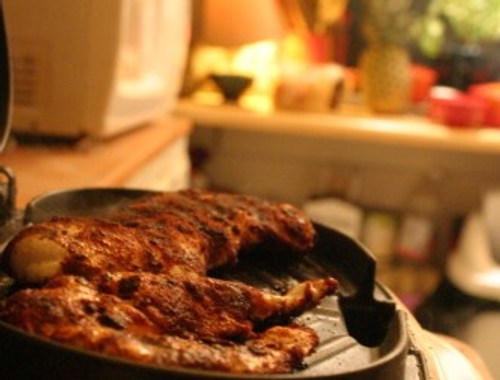
Grill both sides of the chicken until done and tent the with foil to keep warm.

For the cumin sauce: In a small saucepan saute the sliced shallot and diced onion in olive oil. When the onions and shallots are soft, add the white wine and remove from heat. Stir in the cumin and, when the sauce has cooled for approximately 5 minutes, turn the heat on low and slowly add the half and half. (Letting the sauce cool for a few minutes will keep the sauce from breaking. (Or it least it helped quell my paranoia about the sauce breaking.)

Slice chicken and serve on top of Spanish rice with the cumin sauce drizzled on top.

Recipe Sunday: Quick and Easy Greek Salad

Disclaimer: this salad will give you dragon breath for the rest of the day (or the morning after if you choose to have it for dinner). It is still delicious. Feel free to chop the ingredients to whatever size you prefer.

Greek Salad
Prep time: 10 minutes
Serves two

Ingredients
2 plum tomatoes, chopped into large chunks
1/2 cucumber, sliced thick
1 green pepper, chopped
1/4 white onion, sliced
black olives, can be whole or sliced
crumbled Feta (as much or as little as you want)
1/4 cup olive oil
juice of 1 lemon (or 3 tablespoons lemon juice)
1/2 tablespoon dried oregano
salt and pepper to taste

Directions
Combine vegetables in a large bowl. In a small bowl, combine olive oil, lemon juice, oregano, salt, and pepper. Whisk to form dressing. Pour dressing over vegetables and mix together five minutes before serving. Top with lots (or a little) feta cheese, and serve with warm pita or flatbread. If you want, you can add sliced grilled chicken and make a larger meal out of it.

Share your favorite recipes in the comments!

Photo courtesy of Lori_NY

Recipe Sunday: Potato-Leek Gratin

With the (non-stop) snow and cold I decided to treat myself to scalloped potatoes last week. But, then I saw that our grocery store had leeks on sale, only 99 cents each. So, I decided to really treat myself, and make a potato-leek gratin. The main difference between the two, is that a gratin involves a cooked cheese sauce, whereas scalloped potatoes just involve putting layers of potato and onions in a casserole and pouring milk over the top.

Before I got to the sauce, I had a lot of prep to do – and a new toy to cut with. For Christmas my husband bought me a mandolin.  An actual mandolin.

I had wanted one for years, because my knife skills are lackadaisical at best. However: a) I’m ridiculously accident prone; and b) I like to drink while I cook dinner.
You can see how that could be problematic.

But, my husband assured me when I opened the mandolin on Christmas, that it has an excellent safeguard. So, last week I happily went into the kitchen, poured myself a glass of wine, and started prepping potatoes on my new gadget.

The gratin was perfect – cheesy and slightly fruity from the leeks and wine. And the trial run with the mandolin was a success. It was fantastic to not run across randomly undercooked potatoes for once, and (despite my wine consumption) I didn’t hurt myself at all.

Potato-Leek Gratin:

  • 4 medium Yukon Gold potatoes (sliced as thinly and evenly as you can)
  • 2 sliced leeks (white and pale green parts only)
  • 2 cups of shredded swiss cheese
  • 2 tablespoons of olive oil
  • ½ cup of white wine
  • 3 tablespoons of flour
  • 2 cups of warm milk (Heat in the microwave for 2 minutes)
  • ½ cup of shredded Parmesan
  • Black pepper to taste

Pre-heat the oven to 375 degrees.

Saute the leeks in the olive oil and white wine for 5 minutes. Add the flour and stir for 1 minute, then add the milk. When the lumps of flour have smoothed out add the swiss cheese in small batches stirring constantly until the cheese is integrated into the sauce.

Layer the potatoes in a buttered casserole dish and alternate with the cream/leek mixture. When you reach the top layer of sauce on potatoes sprinkle the Parmesan on top. Cover with foil and bake for 25 minutes, then remove the foil and bake until the potatoes are soft and the top is brown.

Recipe Sunday: Double Chocolate Oatmeal Cookies

Today, I want to share with you one of my favorite recipes. It’s super easy and makes a great gift, but it’s perfectly O.K. not to share the results with anyone. I always make these during the Holidays as a gift for some of my company’s top clients, and the one feedback I consistently receive is that they are gone within minutes. I believe the two keys to this recipe (and most other cookie recipes) is to chill the dough while you are preheating the oven (about 20 minutes) to prevent cookie spread (nobody likes a thin cookie), and using a teaspoon (instead of a tablespoon) to shape the cookies in order to create a bite-sized treat.

Double Chocolate Oatmeal Cookies
Total prep time: About 30 minutes
Total cook time: 8 to 9 minutes per batch

Ingredients
1/2 cup (1 stick) unsalted butter, softened at room temperature [you can use salted butter if that’s all you’ve got, and feel free to use the microwave to soften the butter]
1 cup packed brown sugar
1 egg
1 teaspoon vanilla extract
1 1/4 cups all-purpose flour [you can substitute self-rising flour here, just omit the salt and baking powder]
1 1/2 teaspoons baking powder
1/2 teaspoon salt
3/4 cup rolled oats
4 ounces semi-sweet morsels [just over 1/2 cup]
4 ounces white morsels [just over 1/2 cup]

Directions
Cream the butter and sugar until the mixture is light and fluffy. Add the egg and vanilla extract and mix together. Add the flour, baking powder, and salt. Mix thoroughly. Add the oats, white morsels, and semi-sweet morsels and stir until well combined. Chill the dough in the refrigerator for about 20 minutes.

Preheat oven to 375 degrees Fahrenheit. Line a cookie sheet with parchment paper. Place teaspoon-sized spoonfuls a few inches apart on the cookie sheet. Bake for about 8 to 9 minutes, until the tops of the cookies turn light golden and the edges just start to brown. Let cookies cool on the sheet for about 3 minutes before transferring to a cooling rack. Try not to eat all of them in one sitting.

Store leftover cookies (how do you have any left?!) in an airtight container. They will keep for about 5 days, and can also be frozen for up to 3 months. I like to put my leftover cookies in the microwave for about 10 seconds to soften the chocolate before I dig into them again.

Share any suggestions and substitutions, or pimp your favorite recipe in the comments!

Recipe Sunday: Shrimp Scampi and Cheddar Biscuits

Last week, the lovely DahlELama brought up Red Lobster’s cheddar biscuits and I remembered that I had recently printed out the recipe with the intention of making them. I figured cheddar biscuits by themselves are not quite a full meal (although I won’t judge you if you eat all of them as soon as they come out of the oven) and I thought I would share one of my favorite easy recipes: shrimp scampi. Typically, scampi is a butter heavy dish, so I decided to make mine with butter and olive oil to make it “healthier”, or as healthy as pasta in oil can be.
Cheddar Biscuits (12 biscuits)
Recipe courtesy of Todd Wilbur and ABC News
Total prep time: About 15 minutes
Total cook time: About 15 minutes
Ingredients
2 1/2 cups Bisquick baking mix
3/4 cup cold whole milk
4 tablespoons cold butter chopped into small cubes (1/2 stick)
1/4 teaspoon garlic powder
1 heaping cup grated cheddar cheese

Brush on Top
2 tablespoons butter, melted
1/4 teaspoon dried parsley flakes
1/2 teaspoon garlic powder

Directions
Preheat oven to 400 degrees. Combine Bisquick with cold butter in a medium bowl, making sure there are small chunks of butter left. Add cheddar cheese, milk, and 1/4 teaspoon garlic. Mix by hand until the wet and dry ingredients are combined. Drop approximately 1/4 cup portions of the dough onto an un-greased cookie sheet using an ice cream scoop. Bake for 15 to 17 minutes or until the tops of the biscuits begin to turn light brown.

While the biscuits are baking, melt 2 tablespoons butter in a small bowl in the microwave. Stir in 1/2 teaspoon garlic powder and the parsley flakes. When the biscuits come out of the oven, use a pastry brush to spread this garlic butter over the tops of all the biscuits. Use up all of the butter. Makes one dozen biscuits.

Shrimp Scampi (2 servings)
Total prep time: About 10 minutes
Total cooking time: About 10 minutes
Ingredients
1/2 pound medium shrimp, peeled, de-veined, and cut in half
2 tablespoons butter
2 tablespoons olive oil
3 medium garlic cloves, chopped
1 tablespoon lemon juice
Red pepper flakes to taste
Flat leaf parsley to taste, chopped
4 ounces spaghetti, freshly cooked
Salt and pepper to taste

Directions
Heat butter and olive oil in a medium skillet over medium heat. When the butter melts, add the garlic and saute for about a minute, being careful that it does not burn. Add the shrimp and toss to coat. Add red pepper flakes and lemon juice. Cook the shrimp until they are pink, between 5 and 7 minutes. Add the parsley and add the cooked pasta to the skillet. Toss to combine and serve immediately.

Recipe: Spicy Honey Chicken? Yes You Can!

Hi, my name is GtCosita, and I love P.F. Chang’s Chang’s Spicy Chicken. I am not ashamed to put this love out there for everyone to see. You would think that as someone who loves food, I’d be all about trying new things. You would be correct, except for the fact that money is tight and Orlando, FL is not exactly a Mecca of diversity when it comes to restaurants. A few years ago, one of the servers at Chang’s let me in on a little secret: order the honey chicken, ask for a side of Chang’s spicy sauce, and mix. I’ve been hooked on that combo ever since. Last night I felt like making my own, and found two recipes that I merged into the following deliciousness:

Spicy Honey Chicken (2 servings)

Total prep time: About 20 minutes
Total cooking time: About 15 minutes

Ingredients:
Two medium chicken breasts cut into nuggets (or any size you prefer)
1/3 cup cornstarch in a medium bowl
2 garlic cloves – minced
1 tablespoon minced or grated ginger
2 tablespoons chopped onion (if you have green onions feel free to substitute)
2 teaspoons soy sauce
1 tablespoon chili sauce (more or less depending on your spice preference)
3 tablespoons honey
2 tablespoons rice wine vinegar (you can substitute apple cider vinegar or white vinegar)
1 teaspoon salt
1/2 cup water
1 teaspoon cornstarch mixed in 1 tablespoon of water
Vegetable oil for frying

Prep
Heat up oil in a wok or skillet under medium heat. I use enough oil to almost cover the chicken without completely submerging it. While the oil is heating up, combine the soy sauce, chili sauce, honey, vinegar, salt, and the 1/2 cup of water in a bowl. Stir and set aside.

Don’t be afraid to try the sauce and adjust the spice to your liking (if you use your finger to try the sauce, you may want to wash that finger after you’ve put it in your mouth). Add the chicken pieces (a few at a time) to the bowl with the cornstarch and “bread” the pieces with a light coating.

Once the oil is hot (you can test dunk one piece of chicken – if it starts bubbling, you’re ready to go), fry the chicken pieces (turning once) until the chicken is cooked through (about 3 minutes per side for nugget-sized pieces). Take the chicken out and place on a plate with paper towels to drain. Carefully, remove some oil from your wok or skillet (you can put the excess oil in a ceramic bowl to cool), leaving about 1/2 an inch of oil.

Place the wok/skillet back on the burner (still at medium heat), add the onions, garlic, and ginger and cook for about two minutes. Add the sauce and stir for a few more minutes. Once the sauce starts boiling, add the cornstarch/water mixture, and stir for about two minutes. Once the sauce thickens, add the fried chicken back and stir to coat and heat through, about 1 minute. Serve with sticky white or brown rice.