
This recipe has a lot of components, but don’t let that fool you into thinking that it’s difficult.
Continue reading
This recipe has a lot of components, but don’t let that fool you into thinking that it’s difficult.
Continue reading

“There are two kinds of people: those who think there are two kinds of people and those who are smart enough to know better.” -Tom Robbins
Deviled Eggs
This recipe is for one dozen eggs (some don’t make it to the table because they fall apart when peeling the shells off, or get eaten).
Continue reading
Happy cocktail time, Crasstalkers. It’s been a rough week for some of you, and it sounds like everyone needs to forget about Tuesday. So let’s booze it up, shall we?
Here are three ideas to get you started.
Cilantro and Cucumber Martinis
 4 ounces of vodka (the better, the better)
1 inch of finely diced English cucumber
¼ cup of cilantro
Ice
Crush the cucumber and cilantro in a mortar and pestle to make as fine a paste as possible. Pour the vodka, cucumber and cilantro paste into a martini shaker. Let it sit for about an hour, then add the ice, shake, and strain infused vodka into martini glasses. Garnish with cucumber and cilantro.
A Gingered Highball-Julep
 Chop and crush one tablespoon of fresh mint and six or seven slivers of fresh ginger. Put two ice cubes in a large glass. Add two shots ginger ale and stir vigorously to make a quick infusion. Add two shots “good” bourbon (Basil Hayden or Knob Creek are preferred, but Rebel Yell is good too. Note for the poors: Rebel Yell is cheaper than most bottom shelf whiskeys and it’s the best of the bunch, even served just on the rocks. Note to snobs: don’t knock it till you’re poor enough to try it). Add one drop of bitters and a few slivers more fresh ginger for a crunchy, spicy treat.
Salty Dog
 Treat a rocks glass like a margarita glass and rim it with salt. Then add equal parts vodka to pink grapefruit juice.
I’m not going to lie, I just had my first Salty Dog this week, and holy. The salt with the grapefruit juice is incredible. I was on the phone with my mother-in-law while I had my first sip and –- for the first time since we have known each other — I think she thought I was fervently agreeing with everything she said because I said “Yes!” and sighed happily (For the record, I was blissed out and I’m not sure what I agreed to). But let’s not think about any unpleasantness, because it’s Friday, and we all deserve a cocktail.
This recipe has been passed around my family for years. It is our go-to date night recipe, which means that all of my cousins have made this dish for boys that they were trying to impress. This is crazy, seeing as there is a TON of onion in this recipe, and the cream sauce is not necessarily light, making everyone feel like beached whales after the meal. SEXY. I will say that many men have fallen prey to the charms of this recipe, just not on the night of the date.
Cheese Tortellini With Green Apple Cream Sauce
Serves 4 (easy to halve)
Prep time: Approx. 15 minutes
Cook time: Approx. 15 minutes
Ingredients
Directions
Take 1 Zantac. Melt butter in a skillet over medium heat. Add the flour and stir together to create a paste. Add onion and apple, and saute for about 4 minutes. Add brandy, and cook for 3 minutes. Add cream, cheese, ham, pepper, and nutmeg. Turn heat to medium-low and bring to a boil, stirring constantly, about 5 minutes. Serve over cooked tortellini. If you have leftovers, it is best to re-heat them over the stove. If you microwave them, the sauce tends to separate, which means you’ll be left with a whole bunch of butter on the top.
Please share your favorite “date night” recipes below. If you have any funny anecdotes dealing with dating and your cooking, I would love to hear those as well!
Photos courtesy of scottfeldstein and cbransto.
The first time I had chicken marsala was at our friend’s wedding rehearsal dinner in 2006. It was delicious, and I’ve craved it occasionally since then. But, I’ve never made it, mainly because I never think to buy marsala wine. But, then I read that dry vermouth can be swapped out for the marsala. And guess what? I just happened to have a bottle of vermouth languishing on top of our refrigerator.
Marsala normally has mushrooms, but I don’t like them and the dish was so incredibly rich that I can’t imagine how it could have had any more flavor. Seriously.
Chicken Marsala With Vermouth
Olive oil
2 ounces of pancetta
2 sliced shallots
4 thin chicken breasts
Flour for dredging the chicken
Pepper
2 teaspoons of paprika
1 cup of vermouth
5 tablespoons of heavy cream (don’t substitute half and half, trust me on this)
Parsley
Saute the pancetta in a tablespoon of olive oil. When it’s browned, drain it on paper towels.
Saute the shallots in the pancetta drippings and set them aside.
Add more olive oil to the pan and heat it until a drop of flour sizzles in pan. While the oil heats, thoroughly mix together the pepper, paprika and flour. Dredge the chicken in the flour mixture. Fry the chicken in the olive oil, approximately 7 minutes a side. (I like a lot of color on my chicken especially when making a pan sauce, so this is only a guide.)
When the chicken is done, drain it on a paper towel. Turn the heat off, and add the vermouth to deglaze the pan.
Turn the heat back on low, and add the cream. Then add the chicken and shallots into the pan, reheat the chicken and serve over your starch of choice.

I served the chicken and sauce over couscous, because I am madly in love with couscous right now.
Then I added chopped parsley, for contrast: cold against hot, light against the rich cream sauce. And it was incredible – the salty pancetta, the crisp chicken, the creamy vermouth sauce, the shallots, the parsley, the couscous. When my husband came home I was sated. I couldn’t even eat more than half of the piece of chicken.
Which raises the question, “If you make a dish with bacon and heavy cream but can only eat a portion of it, is it really that bad for you?”
Some of you may hear me sing the never-ending praises of my favorite kitchen tool on a regular basis. It is a gift to newcomers and experts alike. It does not discriminate. It could care less if you know your amuse bouche from your ass; if you can shop, chop and read, you’re good to go. See, the magic pot only has four settings; off, warm, low and, of course, high (for those in a hurry). But, its capabilities are seemingly endless. Who knew you could make good lasagna in a slow cooker?
Some helpful tips for using and abusing this ’70s culinary masterpiece:
1. If the recipe calls for veggies, I try to add them as late as possible to preserve the nutritional content. If you want to get fancy, you can blanch the vegetables before adding, but this seems to defeat the “one pot” philosophy.
2. If you are increasing/decreasing the size of the recipe, don’t forget to alter the time accordingly. You laugh, but no one likes brown mush (I learned from experience).
3. Dry beans contain phytohaemagglutinin. I have no idea what this is, but it’s toxic, so all dry beans MUST be pre-boiled for ten minutes before adding them to the recipe. You don’t want to poison the dinner guests. Although, if you do, this appears to be the way to go.
4. Remove all fat and skin from any meat in your recipe. The fat melts and, trust me, it’s not pretty nor does it taste good.
For more helpful hints, this is a great site.
Now, for the GOOD part….. Recipes!
This is one of my favorites and is also very simple.
 Soy Braised Chicken
Serves 4| Hands-On Time: 10m | Total Time: 8hr 00m
Ingredients:
2 medium onions, sliced
4 garlic cloves, smashed
1/3 cup apple cider vinegar
1/3 cup soy sauce
1 tablespoon brown sugar
1 bay leaf
black pepper
8 skinless, bone-in chicken thighs (about 1 3/4 pounds)
1 teaspoon paprika
1 cup long-grain white rice
1 large head bok choy, cut into 1-inch strips
2 scallions, thinly sliced
Directions:
In a 5- to 6-quart slow cooker, combine the onions, garlic, vinegar, soy sauce, brown sugar, bay leaf, and ¼ teaspoon pepper. Place the chicken on top and sprinkle with the paprika.
Cook, covered, until the chicken and onions are tender, on low for 7 to 8 hours or on high for 4 to 5 hours (this will shorten total cooking time).
Twenty minutes before serving, cook the rice according to the package directions.
Ten minutes before serving, if the slow cooker is on the low setting, turn it to high. Gently fold the bok choy into the chicken and cook, covered, until tender, 3 to 5 minutes. Serve with the rice and sprinkle with the scallions.
This recipe for beef tacos is just, well, yummy! I added guacamole and home made salsa to the agenda and eliminated the sour cream. Also, chipotles in adobo sauce have a distinct smoky flavor. If this is not your thing, you can substitute green chiles or fire roasted ones and add some red or green salsa.
 Chipotle Beef Tacos
Serves 6| Hands-On Time: 30m | Total Time: 8hr 30m
Ingredients:
3 pounds beef chuck, trimmed and cut into 2-inch pieces
1 large onion, thinly sliced
4 cloves garlic, chopped
1 to 3 tablespoons chopped canned chipotles in adobo sauce
1 teaspoon dried oregano
2 bay leaves
kosher salt
4 cups thinly sliced cabbage (about 1/3 medium cabbage)
4 radishes, halved and thinly sliced
1/4 cup chopped fresh cilantro
2 tablespoons fresh lime juice, plus lime wedges for serving
12 6-inch corn tortillas
sour cream, pickled jalapeño peppers, and hot sauce, for serving.
Directions:
In a 4- to 6-quart slow cooker, toss together the beef, onion, garlic, chipotles, oregano, bay leaves, and 1 teaspoon salt.
Cover and cook until the beef is very tender, on low for 7 to 8 hours or on high for 3 ½ to 4 hours (this will shorten total cooking time).
Twenty minutes before serving, heat oven to 350° F. In a large bowl, toss together the cabbage, radishes, cilantro, lime juice, and ¼ teaspoon salt. Wrap the tortillas in foil and bake until warm, 5 to 10 minutes.
Transfer the beef to a medium bowl (reserve the cooking liquid) and shred, using 2 forks. Strain the cooking liquid through a fine-mesh sieve into the bowl with the beef and toss to combine.
Fill the tortillas with the beef and slaw. Serve with the sour cream, jalapeños, hot sauce, and salsa.
And lastly, a little something apple.
 Apple Brown Betty (Crocker)
Ingredients:
3 cups apples – peeled, cored and diced
10 slices bread, cubed
1/2 teaspoon ground cinnamon
1/4 teaspoon ground nutmeg
1/8 teaspoon salt
3/4 cup brown sugar
1/2 cup butter, melted
Directions:
Place apples into the crock of a slow cooker. In a medium bowl, toss together the bread cubes, cinnamon, nutmeg, salt and brown sugar (you can also add nuts here). Place on top of the apples and drizzle with melted butter. Cover and cook on Low for 3 hours, or until apples are tender.
Top with vanilla ice cream or whipped cream.
PLEASE share your favorite slow cooker recipes in the comments!
ALSO, here are some great links…..
RealSimple– A great selection!
One for every day of the year– (LCL- Did you bless me with this link?)
Great Vegan recipes– You don’t need to be a carnivore to enjoy the Pot!
Happy CrockPotting, people!
Recipes/photos courtesy of RealSimple.com and Allrecipes.com
What is a shiksa, a goy, a lapsed Catholic doing writing one of the Crasstalk Passover recipes? Well, because it’s a chance to delve into history that’s not my own, and possibly become a better friend – by making asparagus and leek soup with a horseradish gremolata.
My best friend in high school, (oh, so many years ago), is Jewish. And she left our hometown in Vermont after marrying a nice Jewish boy who was going to be attending medical school in Alabama.
But before she left, she asked me to hold the huppah at her wedding. For those of you who aren’t already familiar with the huppah, picture a wedding tent with – as you might expect – four poles. Now picture a tent whose four poles aren’t pushed into the ground, but instead held up by loved ones of a bride and groom. My friend “Dana’s” future husband’s brothers held up three of the poles and I, who in 1992 was a whopping 125 pounds soaking wet, was holding up the fourth. The tent was over 50-feet long and so incredibly heavy that by the time “Dana” started down the aisle, my elbows had buckled. By the time she made it to her fiance, my arms were shaking uncontrollably, and men in the first row were mouthing the question, “Do you need help?” I shook my head, “No.” Because I could not physically unclench my fingers.
They were paralyzed, as if I’d been playing that children’s game in which you curl your fingers into someone else’s fingers and pull back hard for a few seconds and, (voila!), you have paralyzed fingers. I thought of that game the entire time my best friend was getting married. It distracted me from crying, though.
“Dana” left for Alabama the next week, and she has been down there for nearly 20 years. Since then, she has become incredibly involved in an Alabama synagogue, and that has brought out a new and much more religiously devout woman, a woman I am still getting to know.
So, when the idea of this post came up, I was thrilled. I love any chance to work with food. But, then it dawned on me that I know nothing about a traditional Passover meal, other than “no leavened bread.” And to write this article I had to do a lot of research, and put some thought into the meaning of the food that means so much to so many people. Now, at least I know that forbidden leavened products are called chametz.
 I chose this recipe specifically for its spring ingredients (hello asparagus!) and for the fact that the maror, (a group of bitter herbs that symbolize the bitterness of slavery under the Pharohs), would marry perfectly with the asparagus. Instead of using the traditional freshly grated horseradish I used homemade prepared horseradish. (This is made by my grandmother, who makes it once a year in a dedicated blender. She doesn’t do this to make sure that the horseradish is kosher – she does it because the horseradish is so pungent that it can’t be washed away.) In a nod to the fact that many people who celebrate Passover have special dishes that they serve it from – dishes that have never had contact with chametz – I used a pretty soup bowl that my mother gave me. I’m not a hundred percent sure that it has never come into contact with chametz, but I’m 99% sure; She’s not a big fan of crackers or bread with soup.
And just putting this meal together has helped me feel a little bit closer to my friend in Alabama, who I’ve only seen a handful of times over the last two decades.
At any rate, posting a recipe for Passover is more useful to “Dana” than the time I helped her get married.
Asparagus and Leek Soup With a Horseradish Gremolata
Preheat oven to 350 degrees.
Gremolata
Trim asparagus by bending the stalk until it breaks naturally. Place asparagus on a sheet pan with 2 tablespoons of olive oil and salt and pepper. Roast the asparagus for 10 minutes, or until it has browned slightly. (You don’t want to overcook the asparagus, you just want it soft with color.) While the asparagus is cooking, wash the leeks thoroughly, slice them, and saute them in olive oil in a soup pot. Once they have wilted, add the white wine and cook until they are very soft. Chop the cooked asparagus in half and add to the soup pot. Add the chicken broth. Blend the vegetables and broth until smooth. Either do this in batches in a blender or use an emulsifier. Then heat the soup, ladle into bowls and add the horseradish, lemon zest, scallion, and parsley.
The soup is simple to make, and it’s very thin – nearly a consomme. But, it’s incredibly delicious, and the gremolata adds a layer of flavor that makes this little soup big and bold. This isn’t meant to be the centerpiece of a Passover meal, but it would make a lovely springlike and kosher beginning to a heavier dinner.
(Special thanks to DahlELama for her help.)
Ask almost anyone what their favourite food was when they were a child, and chances are, they can give you an immediate answer. Because I love food and am indecisive, my answer would probably be a mixture of foods Momma DS used to make for me- grilled cheese, banana slices in milk for breakfast, Kraft Dinner, sliced cucumbers soaked in salt and vinegar, Chocolate chip cookies made so many times mom and I no longer needed to look at the recipe… and Mushroom Chicken Rice.
Of all the foods mom made for us, this one has remained both my brother’s and my favourite food that reminds us of our childhood. As well, this recipe is my go-to meal when I want plenty of leftovers for work lunches. (Ok, breakfast too. I love leftovers for breakfast!) Mom’s recipe was simpler than the 0ne I now use, but no less delicious. I’ve modified it over the years through trial and error, before finally settling upon this particular method.
I tend to eye-ball it when making recipes, but I will do my best to break everything down into measurable quantities.

Ingredients:
1 big-ass casserole dish. Mine is big enough to bake a chicken in. I don’t know the actual dimensions.
3 cups of Minute Rice (I never said this was fancy food!)
6 (or so) cans of Campbells Mushroom soup (I’ve tried no name brands, but don’t like the taste. If you have a canned version you prefer over mine, go nuts.)
A package of chicken thighs (6 or so?). My mom used chicken breasts, but I find then too dry for my tastes. Again, if you prefer white meat, feel free to substitute it in.
Salt, Pepper, Cayenne Pepper for a bit of heat.
Oven temperature: 350 or so.
Lets get cooking!

First of all, I was a dunce and bought chicken thighs with the bone in. If you did too, go ahead and carve those suckers out. 
Next, you’ll want to cook the rice. I usually make about 3 cups of Minute Rice.
(3 cups of rice, 3 cups of water, dash of salt and a little bit of margarine in the water.) I tend to add more rice than water so it comes out firm- that way, it will absorb some of the mushroom soup while baking. I usually add an extra handful, or about 3/4 cup.
While I am waiting for the rice to absorb it’s water, I cook the chicken. This was the first time I used chicken thighs, and I was pleased with how they turned out. It doesn’t matter if the skins are left on or off. I left them on just to experiment, but to make the dish a bit healthier I would remove them next time. Season the raw meat with a bit of salt n’ pepper, and fry then up in a hot pan greased with a bit of EVOO (Extra Virgin Olive Oil) till they are cooked through. Remove from pan and set side.


To save doing extra dishes, I empty out the cooked rice into the casserole dish I plan to bake the food in, Using the now empty pot, I empty my cans of mushroom soup into it and heat the soup over medium until it starts to become hot and runny, stirring often so the bottom doesn’t burn. I don’t add water or milk because it isn’t necessary, and would only dilute the flavour. I season the soup-goop mixture with a dash of salt (1/2 a teaspoon maybe?), a bunch of black pepper and a generous shake of cayenne pepper to give the recipe a bit of kick, without being spicy.
Now is the time to add the rice back into the soup. I cook the mixture for a few minutes, just so it’s all mixed together.
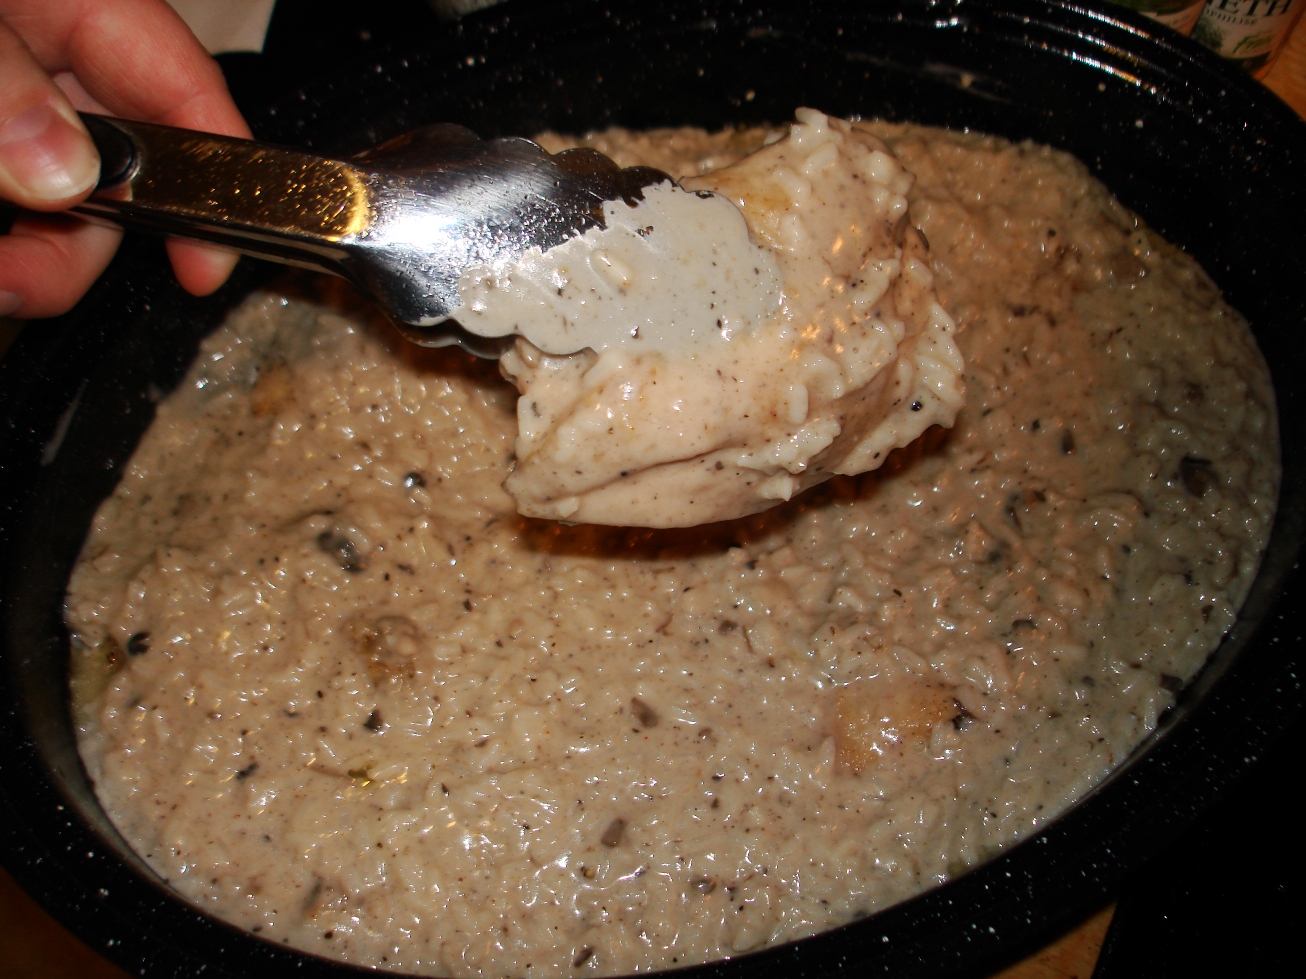
I spray my empty baking dish with a light coating of cooking spray, and spoon in a small layer of the rice mixture till the bottom is covered.
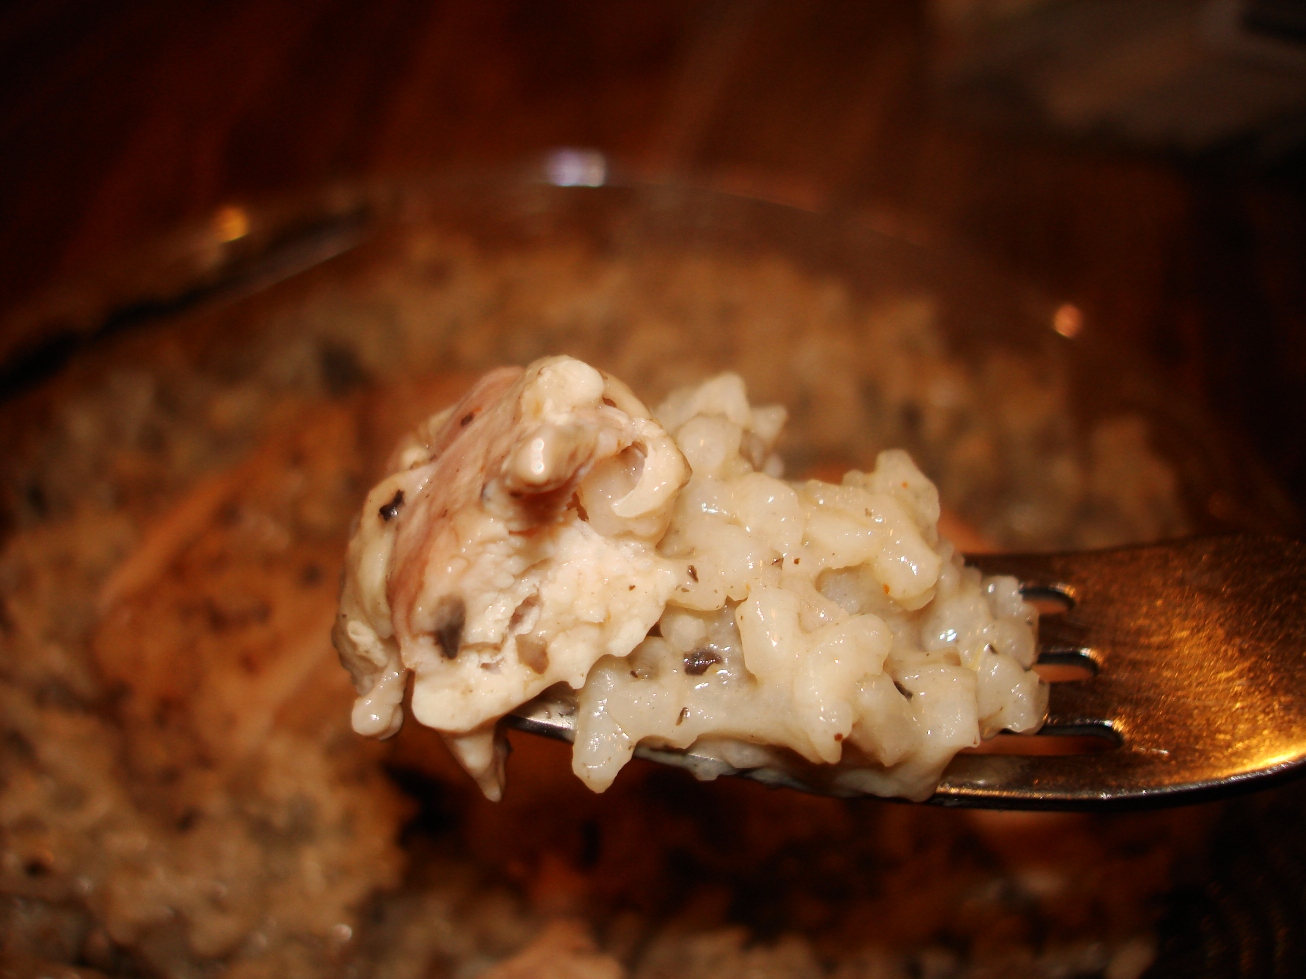
Next, I layer the cooked chicken pieces around the dish, and cover it with the remaining soup/rice mixture. Sometimes I’ll add an extra can of mushroom soup to the top of the casserole to make it extra delicious- the soup looses some of it’s moisture while baking and turns into a nice, creamy sauce.
I put the cover on the dish and bake it at around 350 F for about 45 minutes- just long enough for

The rice to absorb some of the soup, but not so long that the edges begin to get crispy and dehydrated. You never want to cook it so long that the layer of soup on top evaporates- that top layer of soup is my favourite part.
Now it’s time to eat! This dish is so easy to make as a side or vegetarian- just reduce the proportions and leave out the chicken.
Enjoy!
Nothing says Sunday like a Bloody Mary. It’s an important part of many brunches and (depending on your Saturday night and the heartiness of your Bloody Mary) can take on the role of a full meal if you’re not careful. There are also few things less classic then a Bloody Mary in a gigantic A&W mug. But I think that the parfait spoon to dig out the olives helps elevate this to near “classic” status.
So, welcome, hung-over Crasstalkers, to a classic Bloody Mary that could substitute for any meal.
Bloody Mary
Add a celery stalk, if you want to feel fancy and have a tool to continually stir your ingredients so you don’t just get a mouthful of sludge at the bottom. (Or in case you are so hung over that you need to check your reflexes by stirring your drink, and patting yourself on the head simultaneously.)
Clearly, these are just rough guidelines. The idea is, don’t be afraid of your Sunday morning and if this doesn’t put hair on your Misters or your “Little Suzy”, then you’re not doing it right. But remember, practice makes perfect.
Especially on a Sunday.
